
In this blog post, I will show you how to deploy a NestJS application on Kubernetes. NestJS is a Node.js framework that makes it easy to develop server-side applications. Kubernetes is a powerful open-source platform for managing containerized applications. Together, these two technologies can help you build and manage scalable applications quickly and easily.
The purpose of this tutorial is not to give you an in-depth explanation of Kubernetes, but rather to focus on the practical side, with a hands-on demo project to help you get your first practical experience with it.
The project we are going to use as a starting point is composed of two applications, and a Kafka message broker, those are the components we are going to deploy on Kubernetes. You can find the repository containing the NestJS applications and all Kubernetes templates at https://github.com/thiagotigaz/microservices-nestjs-k8.
The Kafka setup going to be explored is not ready for production, and I would not recommend running Kafka or any database on Kubernetes. Let’s get started!
Prerequisites for Running NestJS on Kubernetes
In order to follow this tutorial, it is necessary to have a working Kubernetes cluster where you can create components using the kubectl command.
The docker installation on MacOs already includes a Kubernetes cluster setup when the option is enabled on the configurations panel.

In case your local Docker installation does not support Kubernetes, you can install it following one of the many available methods present on the official Kubernetes documentation.
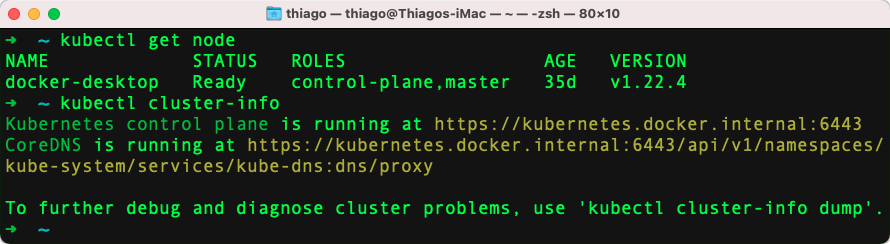
To validate if you have a working environment, you can use the following command:
kubectl get node
kubectl cluster-info
Following is the expected output:
Getting Started from the Completed Source Code
Let’s start by creating all the Kubernetes components necessary to run Kafka and the two NestJS applications using the template files present on the repository.
git clone -b part4 https://github.com/thiagotigaz/microservices-nestjs-k8.git
docker build -t limascloud/node .
./k8-startup.sh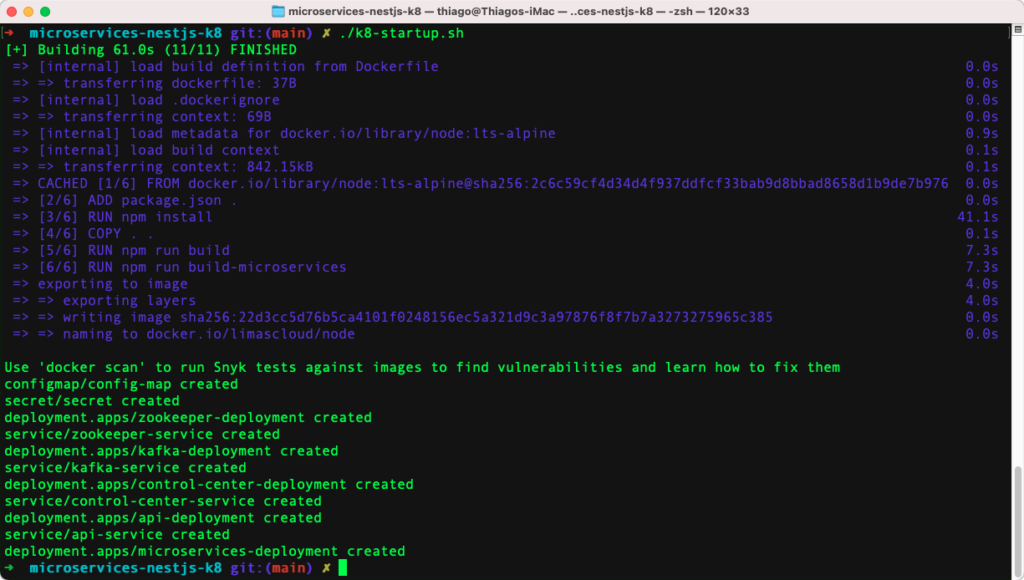
To check the created resources, you can use the following command:
kubectl get allThe API and microservices deployments used the locally built limascloud/node Docker image. The image’s Dockerfile is based on NodeJS and contains both applications. In order to define which application should be run when the pod is started, it is necessary to declare the args property (same as CMD on Docker) with the path of the built application.
Now that the resources are created, we are going to learn about the main Kubernetes components that you as a developer will be working with when deploying a NestJS application on Kubernetes. I am going to show you step by step how each component in Kubernetes helps you deploy such applications.
What are Pods and how are they created?
The basic component or the smallest unit of Kubernetes is a pod. A pod is basically an abstraction over a container. If you are familiar with Docker containers, then basically what a pod does is to create this running environment or layer on top of the container. The reason pods exist is because Kubernetes wants to abstract away the container runtime so that it can be platform-agnostic, and also because you don’t have to directly work with docker or whatever else container technology you use – you only interact with the Kubernetes layer.
A pod is designed to host just one application container. Multiple containers may be run inside a pod, but it’s uncommon unless you have one primary application container and a helper container that must operate within the pod.
Although pods can be created using the kubectl run command with the --restart=Never flag, it is not recommended. The proper way to create pods is by using the Deployment API that is going to be explained next.
Using Deployments to control Pods and Replica Sets
A Kubernetes deployment is a blueprint or template that defines how to create or modify instances of a pod that contains a containerized application.
Deployments can be used to set the number of replicas of a pod, enable rolling updates in a controlled fashion, or roll back to a previous image version in case of failures.
A ReplicaSet is a pod-level replication controller that ensures a specified number of pod replicas are always running. If a pod dies, the ReplicaSet will construct a new pod to replace it.
Although a ReplicaSet ensures that a specified number of pod replicas are running, a Deployment is a higher-level component that manipulates ReplicaSets and supplies declarative updates to Pods. Therefore, it is recommended to use Deployments instead of directly using ReplicaSets.
Using Kubernetes Services to balance traffic across Pods
In order to make our API accessible from the internet, we need to create a service for it. By default, all traffic inside a Kubernetes cluster is private, meaning that Pods can only communicate with other Pods in the same cluster. In order to make our API externally accessible, we need to expose it as a service.
A Service is an abstraction for a set of pods and provides a single point of access (via DNS) to these pods. Kubernetes Services select pods using labels, and all the pod instances that have the same label are part of the service.
There are 4 types of services:
ClusterIP: Exposes the Service on a cluster-internal IP. Choosing this value makes the Service only reachable from within the cluster. This is the defaultServiceType.
NodePort: Exposes the Service on each Node’s IP at a static port (theNodePort). AClusterIPService, to which theNodePortService routes, is automatically created. You’ll be able to contact theNodePortService, from outside the cluster, by requesting<NodeIP>:<NodePort>.
LoadBalancer: Exposes the Service externally using a cloud provider’s load balancer.NodePortandClusterIPServices, to which the external load balancer routes, are automatically created.https://kubernetes.io/docs/concepts/services-networking/service/#publishing-services-service-types
ExternalName: Maps the Service to the contents of theexternalNamefield (e.g.foo.bar.example.com), by returning aCNAMErecord with its value. No proxying of any kind is set up.
To deploy our stack (NestJs Applications and Kafka) we are going to create services of types ClusterIP and NodePort.
Deploying the NestJs with Kafka stack on Kubernetes
The stack going to be deployed is composed of a API application, a microservices application, and a Kafka cluster (Kafka, Zookeeper, and Confluence Control Center).
To deploy the Kubernetes resources you can use the kubectl apply -f filename.yaml command. Our k8-startup.sh script uses this command to create our stack using the template files.
Zookeeper, Confluent Kafka and Control-Center Configurations
NOTICE: This Kafka setup is not suitable for production and provides no redundancy or durability. It is a single replica/pod per Zookeeper, Kafka, and Confluent Control Center application. THIS IS FOR TESTING AND DEVELOPMENT ONLY.
k8-templates/k8-kafka.yaml
The Zookeeper‘s deployment contains one replica and a service of type ClusterIP as it is only accessed within the cluster. The Kafka creation is similar to the Zookeeper’s, the only difference is on the service type – that is NodePort.
The reason why the NodePort service type is used is that we want to access the Kafka server from the host machine during development. The nodePort property is used to specify a port (from range 30000-32767) that will be bound to localhost on the node host. In our case, the Kafka server will be exposed on port 30094.
The third piece of the Kafka setup is the Confluence Control Center web application. This Control Center is an intuitive tool that helps to configure and monitor Kafka clusters and topics. The Control Center deployment is contained of just a single replica and is exposed to the host machine using a service of type NodePort on port 30021.
ConfigMap – Externalizing Deployment Configuration Data
k8-templates/k8-config.yaml
ConfigMaps are API objects that store non-confidential data in key-value pairs. They are often used to store configuration data specific to a deployment or environment.
ConfigMaps can be consumed as environment variables, command-line arguments, or as configuration files in a volume.
On the example above, under the kafka-deployment, the KAFKA_ZOOKEEPER_CONNECT environment variable was declared using the valueFrom and configMapKeyRef properties to reference the value declared in the ConfigMap.
Kubernetes Secrets
k8-templates/k8-secret.yaml
If the data you want to store is confidential, use a Secret rather than a ConfigMap. Secrets can be used to store passwords, tokens, and other sensitive information.
In the example below, a Secret named secret is created with the key postgres-password and the base64 encoded value password. The Secret can be accessed from within Deployments or Services by using the secretKeyRef property.
To base64 encode and decode you can use the following commands on macOS terminal:
echo password | base64
echo cGFzc3dvcmQK | base64 -D
NestJS API Kubernetes Deployment
The API is built in Node.js, and it utilizes NestJS as the web framework to construct REST endpoints for processing requests and sending events to a Kafka topic.
k8-templates/k8-api.yaml
The API deployment is pretty straightforward and consists of a Deployment and a Service of type NodePort. The Deployment contains 2 replicas and uses the limascloud/node image built here in the container definition. The Service exposes the application running on pods on port 3000 to the host on port 30100.
NestJS Microservices Deployment
The Microservices project is a NestJS application used for consuming the Kafka topic containing the messages produced by the API.
k8-templates/k8-microservices.yaml
This component’s configuration is straightforward and simply requires a Deployment. Because the microservices application doesn’t require access from the outside, it’s not necessary to create a service.
Useful Kubernetes Administration Commands
Following are a few useful commands used in the making of this post to help create, monitor, troubleshoot, and describe Kubernetes components.
kubectl get allkubectl get nodeskubectl get serviceskubectl get replicasetkubectl get deploymentkubectl delete deployment deployment-nameecho postgresuser | base64echo cG9zdGdyZXN1c2VyCg== | base64 -D
Conclusions
Kubernetes pods, deployments, and services are the backbone of Kubernetes orchestration. Understanding how these three components work together will help you get up to speed on this emerging technology. You’ll also be able to communicate with your team about Kubernetes in a more nuanced way as well as troubleshoot any issues that may come up.
In this post we looked at how to deploy a NestJS API and Microservices project on Kubernetes. We also took a look at some useful kubernetes administration commands. Finally, we looked at the different components that make up a typical NestJS application and how they are deployed on Kubernetes.
I hope you’ve found this post helpful. If you have any questions or comments, please feel free to reach out to me at thiago@limascloud.com